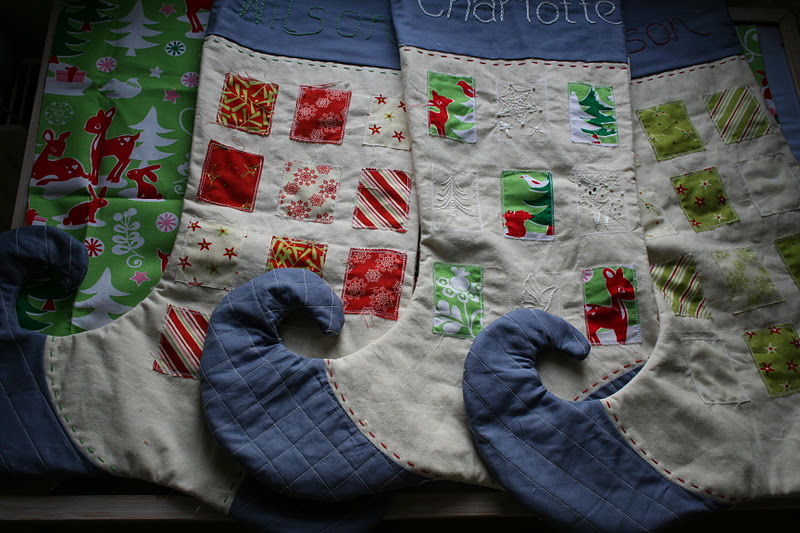
For anyone that wants to join in with a whole year of Christmas stuff here is the tutorial for my curly toed stockings
You will need:
Plain paper larger than the desired stocking size
Pins
Plain fabric for the main body and lining
Contrast fabric for the heel, toe and cuff
Christmas fabrics for the patch details
Wadding
Embroidery threads
Ribbon for hanging
Firstly you need to draw out the overall outline of your stocking in the size that you would like your finished stocking to be.
Trace this stocking onto a new piece of paper, then draw a curve around the heel, an inverted curve at the toe and a straight line across the top for the cuff.
Cut out all 4 pattern pieces out of paper and you should still have a whole stocking on a seperate piece of paper, cut this out too as this will be your lining pattern
Fold your contrast fabric in half (so that you get 2 of each pattern piece when cut) place the toe, heel and top band onto the fabric, allow space around each one for your seam allowance. Pin each piece in place using plenty of pins. Cut around each one, ensuring you leave a 1/4" seam allowance around each piece.

Cut your Christmas fabrics into 11 2" x 2.5" pieces, fussy cut them if the fabric suits
Place your Christmas fabrics onto your main stocking body, ensure you are happy with the layout and spacing and then pin in place


Pin the heel to the main body of the stocking, this is tricky as you are pinning a sharp curve so I would recommend using lots of pins, placing them every cm so they really hold the fabric in place. You need to use your fingers to curve the heel into the main body fabric. The same goes with the toe, as shown below. Machine stitch.


I spray baste my wadding to my front and back but pinning obviously works if thats your preference
Quilt as desired. I hand quilted around the edge of the heel, toe and cuff and then machine quilted the heel and the toe as well but left the main body un-quilted.
Place the front and back right sides together, lining up the seams at the heel, toe and cuff. Pin and then machine stitch.
Snip into the seam allowance wherever there is a steep curve, trim the seam allowance right down at the end of the toe.
Turn stocking out and press.
Place your lining pattern on your folded lining fabric, pin and cut, again ensuring you leave a 1/4" seam allowance (NOTE, I cut off the end of my toe on the lining as I didnt want my lining to go all the way to the end, I wanted to stuff the toe to create a full padded look)

If stuffing your stocking toe then do so now, I use polyester stuffing from an old cushion.

Turn the top of your stocking in by approx 1/2" and press
Turn the top of your lining out by approx 1/2" and press.
Place the lining inside of your stocking. Line up the lining seams with the outer stocking seams.

Take an 8" piece of ribbon, double over and place the ends inbetween the stocking outer and lining. Pin it all in place and then topstitch.


Any questions just ask, I feel like I could have said so much more and put so many more pics but I dont want to bore you to tears!
1 comments:
I totally want to work on Christmas presents soon too, although I think I need to give myself a couple of month off before I can deal with anymore xmas, but I will join in here soon!
Post a Comment