Saturday, December 31, 2011

In Honour of Emily

A while age I signed up to make a string block or two for Val over at Pink Please, she is making a quilt to auction off to raise money for cancer, you can read all about it here. Anyway as soon as Kelly facebooked me about it I knew I wanted to be involved , I think that cancer unfortunately affects most of us at some point one way or another and anything we can do to help is important.

40 people all making at least 1 block, it's looking pretty cool so far I must say.

I have made my blocks in honour of Emily, my cousins wife. Emily is a sweet and lovely woman, she is 30 and got married in July of this year. Sadly Emily lost her mother to cancer as a young teenager and has now been fighting this awful disease herself for many years.

Now im a sucker for a good wedding and im a cry baby anyway but their wedding was wonderful and so filled with emotion, I had a fabulous time but oh did I cry. It makes me well up just thinking about it, there were so many references to Emilys mother throughout the day, she may not have been there but her memory certainly was.

Anyway these are the blocks I made, made using this tutorial.


I love them and they were so fun to make, I think I want to do a whole string quilt myself now using reds, blues and yellows.


I also decided to do a little something extra so I made this block using a pattern from this website

A little research showed me that Lavender Ribbons symbolise cancer in general, maybe this may come in handy for the back of the quilt.

Hopefully they won't take too long to get to Val, normally it should take a week UK to USA but at this time of year who knows! Lets hope this quilt raises a lot of money, every little bit can make a difference.

Keep an eye out for my checkerboard block tutorial that I have coming up later.

Tuesday, December 27, 2011

Fun Fabrics for Fussy Cutting

At the moment I am really into using small pieces of fabric that you can fussy cut to show off lovely little details, this is a great way of using up scraps but I increasingly find myself buying fabrics that I can do this with. The most recent makes of mine that use fabric in this way are my Sew Mama Sew giveaway prizes and my Christmas Stocking.


Earlier today I spent some time (a lot of time) browsing The Fat Quarter Shop, I then read this blog post over at Quiltstory which led me to this great competition and so I decided to put together my own bloggers choice bundle. I could have put so many together as I loved so many fabrics and I think I have pretty eclectic tastes (read that as mixed up!!!) but this was my final choice

Man alive did I have trouble doing that mosaic, I don't know if Christmas has addled my brain but I could not for the life of me do it, I normally use mosaic maker and flickr but I could not manage to 'borrow' the images from the fat quarter shop and put them onto flickr so I could not make a mosaic! I have a mac and it would not let me just copy and paste the images into mosaic maker. In the end I made a pinterest board, then copied all of the images onto a word document then had to turn it into a pdf and from there I was finally able to save it as a jpg. This in the end has taken me hours of trial and error trying to do it in so many different ways, even now its not perfect as it has a massive white boarder that I can't get rid of. So am I just being very blonde? Anyone that could shed some light on an easier way of doing this?

So that was my mosaic and here they are individually


I do like bright colours but I also like that these can be toned down with neutrals and linens. I'm loving fabrics with text/lettering and I'm always drawn to nautical (in fabric and fashion). I'd use these to make cute things for my boys bedroom, quilts with larger blocks and cushions using small fussy cut pieces, as well as cute purses, cushions and pouches for me. I also love the paper pieced blocks that are being done over at Pink Penguin, Very Kerry Berry etc. and I think some of these would work brilliantly.

So what do you think? Would you buy any or all of these? do you like to use fabric in the same way that I do? I find it fascinating to find out how other people make their fabric choices

These bloggers choices seem to be popping up on alot of peoples blogs at the mo, here are some of my favourites i've seen so far: Leila has done a gorgeous one, I want to buy it, I love her blog, she does some gorgeous work. Arianes is another one that I would buy and use. I like Kiries unusual choice of colours. Maureens is lovely and bright and modern and Michelles is too and it contains toadstools which I love at the mo!


Monday, December 26, 2011

Merry Christmas 2011


Woo hoo, our Christmas has been wonderful, how about yours?

The stockings were hung, unfortunately they were not finished as I ran out of time, oh well they were useable and they will be done for next year, Father Christmas found them and filled them with pressies so thats all that matters. 3 were nearly finished, quilted and front and backs sewn together but not lined!
 As the only girl in the household I decided that mine needed to be pretty, so it has a little embroidery


 And we all needed names so Father Christmas knew whos went where!
 Unfortunately hubbys did not get finished and he ended up with a pillow case, can you tell why it didn't get done?
 Whoops! didn't think that one through properly did I, oh well he didn't mind
I will be doing a tutorial for these sometime in the new year, i'm aiming for one Christmas thing done every month of 2012 so maybe the tutorial will be done in January and I can make sure they are all finished!

We have had the best Christmas ever, filled with fun, family and laughter. Having a 1 year old and a nearly 3 year old in the house certainly make a difference to our day. We bought all the men and boys nerf guns and the boys also got given potato guns and we ended up having a massive fight, so much fun, even my mother got involved. Then there was the games, wine and butterbeer! definitely a Christmas we will not forget. Hope you all have had a wonderful day, enjoy the rest of your day.

MERRY CHRISTMAS XXX

Saturday, December 17, 2011

Sew Mama Sew Giveaway Winners

Well the giveaways have come to an end and I have some winners to announce, before I do I want to say thank you to everyone that entered and to all my followers old and new, I can't believe how many new followers I have, Hi to you all, its lovely to have you.  I hope you will join in frequently, I love comments and try to reply to them, I think its lovely to get to know each other a bit.

By the way have you had a chance to read my new Paper Pieced Union Jack Tutorial yet?

Here goes:

The winner of the zippy pouch is No. 24 - Melissa


Melissa said...24

I love to see what people are doing. New ideas are always awesome!


The winner of the Cushion cover is No. 83 - Heather


Heather said...83

Absolutely gorgeous pillows. My photo tip: It's okay to use a tripod.

I will be in contact with you both by email soon.

Back soon with some posts with pictures in (hopefully, children allowing!!!)


Thursday, December 15, 2011

Foundation Pieced Union Jack Tutorial

Ok so here goes with my first tutorial, fingers crossed it will go well and all make sense. So this is something that I have made for someone else but thought I would talk you through the process so if you like Union Jacks you can go ahead and make your own.

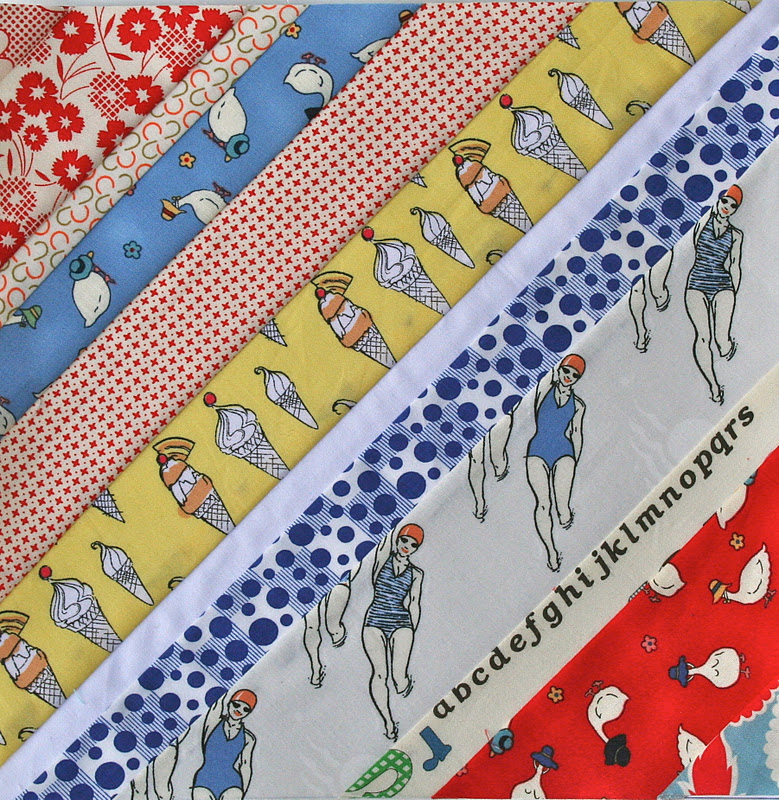
Before I show you any pics I would just like to tell you that this is a pressie and therefore not my usual taste in fabric, it also needs to be very durable so I'm using some heavy weight tapestry fabrics but this would be really cool in quilting fabrics. Also read the whole post before attempting as I have some helpful hints and tips at the end.

(Tapestry fabric doesn't press well, so the photo doesn't do the nice straight seams justice!)

Here goes:

Step 1 - decide on the finished size you want your union jack to be, mine is going to be 13" square finished

Step 2 - grab some paper and draw out the outline of your union jack using a ruler and making sure everything is square, i'm only drawing half of mine out as I don't have paper big enough but that's fine as long as you have a photocopier

Step 3 - If you have drawn the whole outline then divide it into quarters, if you have just drawn half like me then divide it in half

Step 4 - draw in where your central crosses will be, bearing in mind that the thickness of the vertical one will be doubled if you have just drawn half. I made mine 3" wide so I drew the central one 1.5" wide, also remember that this central cross actually contains a main cross with a thin outline (traditionally white), therefore you need to decide the thickness you want the cross and the outline and they need to equal the width you have allowed. Mine is 3" wide, 2" for the main central cross and 1/2" for the outline on each side (the picture only shows the outer 3" line though)

Step 5 - Very faintly draw a line diagonally from the centre of your block to each corner

Step 6 - Decide how thick you want your diagonal stripes to be, I chose 1" for the central diagonal (traditionally red), 1/4" for stripe above and 1/2"for the stripe below (both traditionally white)

Step 7 - Draw a faint line 1/4" around the outside of your Union Jack, this will be the outer seam allowance

Step 8 - Cut your pattern out and photocopy, I decided to just cut out a quarter and then I photocopied this 5 times (1 for each quarter of the union jack, 1 for cutting out the shapes to use as patterns for fabric pieces, the original to be stored for future use), this way I could be sure they were all exactly the same but by drawing out half I had a really good idea of whether the sizings I had chosen would work visually. Draw in any lines that are faint.

Step 9 - Put 4 quarters to one side for use in a minute, store your original away and with the other cut up the pieces to help cut the right size and shape pieces for us to sew together

Step 10 - I am going to ignore the 2 central stripes as I think it will look better to sew them in as whole strips later, so start by taking one of the triangles and pin it to your fabric, you want to leave about 1/2" all around it when you cut it out.

Step 11 - Put it against the reverse of one of your quarters, hold it up to the light checking that you have at least 1/4" hanging over the lines. You also need to make sure that the right side of the fabric is facing out, you do not want the right side against the paper!!!

Step 12 - Sew along the line to secure the pattern piece in place.

Step 13 - Fold the paper along the line that you have just sewn, measure a 1/4" seam allowance and trim with your rotary cutter

Step 14 - Line up your next pattern piece, right sides together with the edge that you have just trimmed

Step 15 - Sew in place, if your seam allowance was wider than 1/4" then trim the excess.

Step 16 - Open up and press in place, check that you have at least 1/4" around the unsewn edges (if not then unfortunately you need to unpick, jig your pattern piece around and re-sew, otherwise you get to the end of the block and realise you need to do it all over again like I did!!!)

Step 17 - This time you will not have a sewn line to fold back, you need to fold the paper back along the next sewing line so that you can trim to the 1/4" minimum seam allowance, line your next fabric on top and sew

Step 18 - Repeat with each pattern piece until the quarter is complete

Step 19 - Turn it over, check that there is fabric overhang over all of the edges (just so you are sure that you have all of the 1/4" seam allowances that you need) and then trim all of the overhang off

Step 20 - Repeat this for all of the 4 quarters

Step 21 - Remove the paper - this needs to be done very carefully as you don't want to distort the stitches, I tend to pull the paper to the side rather than up, this way it tears quite well at the perforated line (most of the time)

Step 22 - Now i'm going to revert to regular patchwork, cut the strips for your central cross and the outline, I cut a long strip 1" wide for my outlines (1/2" finished, with 2 x 1/4" seam allowances) and 1 long strip 2.5" wide for my central cross

Step 23 - Sew your outline strips to 2 sides of each quarter block

Step 24 - Join 2 quarter blocks together with a strip of your central cross in the middle, make sure every lines up properly. Repeat for the other 2 quarters

Step 25 - Join the 2 halves together with a strip of the central cross in the middle, again making sure you are lining up everything so it matches. Press and WooHoo a finished Union Jack!

Hints and Tips:

  • Some people swear by sewing over all of the lines first but without any thread so that they perforate the lines and make them easier to tear at the end (I do this if I remember or can be bothered)
  •  I never get through a paper pieced block without making a mistake, just don't beat yourself up if this happens (it normally happens to me if I get smug and try to take short cuts)
  • It always uses way more fabric than you think it should
  • By cutting the individual paper patterns you can get your grain going in the correct direction if you wish, although if im really short on fabric then I don't let this bother me
  • I do a few backwards stitches at the start and finish of each line to really help secure it
Yay my first tutorial, sorry for it being so lengthy but I wanted to make sure each step was clear. So what do you think, does it make sense? is it something you might make? be sure to tell me if you do and any constructive criticism is welcome

Linking up with Fabric Tuesday at Quiltstory, go check out all the lovely projects